You open your shirt drawer to grab something quick, and the whole thing is a wall of wrinkled fabric. You tug one shirt out, three others collapse, and now you’re late and annoyed.
Sound familiar? The problem isn’t that you’re bad at laundry. It’s that most of us were never taught how to fold — we just sort of folded things in a way that looked okay in the moment and called it done. Then we stacked everything in a drawer and hoped for the best.
This article covers 3 folding methods that actually work for different shirt types: the classic flat fold for shelves, the KonMari file fold for drawers, and a specific technique for button-downs and long sleeves. Set aside about 15-20 minutes to go through your current drawer, and you’ll end up with shirts you can actually find and pull out without causing a collapse.
Why Your Shirts Won’t Stay Organized (And What’s Really Going On)
Here’s the real issue: stacking is the enemy.
When shirts are piled on top of each other, you always grab from the top. The shirts underneath never get touched, never get reorganized, and eventually the whole stack leans, tips, or gets shoved to the side when the drawer won’t close. It’s not a willpower problem. It’s a structural one.
Most people fold by instinct — fold in half, fold again, drop it in. It looks fine until you add a second shirt, then a third. By the time the drawer is full, nothing is actually flat. Everything is slightly lumpy, slightly sideways, and the second you pull one shirt out, the neighbors collapse.
The fix isn’t buying a beautiful new organizer. That helps later, but organizers don’t solve a stacking problem — they just organize the chaos into categories. The real fix is changing how you fold before anything goes back in the drawer.
Here’s what we’re covering: a flat fold that works for shelves and cubbies, the file-fold method that makes shirts stand upright in a drawer so you can see every single one at a glance, folding techniques for button-downs and long-sleeve shirts, and how to set up your drawer so the system actually holds.
What You Need Before You Start Folding
Good news: you don’t need much.
What to gather before you start:
- A flat, clear surface. A dining table or bed works perfectly. Folding on top of other clothes or in the air is how you end up with crooked, lumpy shirts.
- Shirts that are washed and fully dry. This matters more than it sounds. Folding even slightly damp shirts causes wrinkles that set in, and over time, that faint mildew smell is no coincidence.
- 15-20 minutes of uninterrupted time. Not to fold one shirt — to refold your entire current collection at once. Doing it all in one session is what creates a system that lasts. Folding half and leaving the rest defeats the purpose.
- Optional but genuinely helpful: drawer dividers or small fabric bins. These aren’t required to fold correctly, but they make a big difference in keeping folded shirts standing upright once they’re in the drawer. Adjustable fabric bins and expandable drawer dividers are affordable and widely available. More on this in the setup section.
That’s it. No special equipment, no elaborate prep. Just clear the surface and grab the shirts.
The Classic Flat Fold: Best for Shelves and Stacking
This is the method most people are closest to doing already — but with a few tweaks that actually make it work.
Use this fold when you’re storing shirts on open shelves, in cubbies, or anywhere you’ll be stacking them horizontally. It also works inside a drawer if you’re storing fewer than 5-6 shirts and aren’t trying to maximize space.
How to do it:
- Lay the shirt face-down on your flat surface. Smooth out any wrinkles with your hand before you fold.
- Fold one side in about one-third of the way. Then fold the sleeve back so it lies flat along the body of the shirt — not sticking out past the edge.
- Repeat on the other side. The shirt should now be a long, narrow rectangle. Both sleeves are tucked in, nothing is hanging over the edges.
- Starting from the bottom hem, fold the shirt up in thirds until you have a compact, flat rectangle. The collar or neckline should be on top, facing you.
The finished shirt should lie completely flat with no bulk poking out from the sides. If it looks puffy or uneven, unfold and try again — the first fold-in on each side is usually where it goes wrong.
Common mistake to avoid: Folding too loosely. If each fold isn’t crisp and close to the shirt’s edge, the finished rectangle puffs up and takes way more space than it needs to. Press each fold down with your palm as you go.
Best use case: Stacked shelves, linen closets, open cubbies, or storage bins. This fold works fine for stacking — just know that you’ll still be pulling from the top, so it doesn’t fully solve the “everything collapses” problem. For that, you want the next method.
The KonMari File Fold: The Method That Changed Drawers Forever
If you’ve never done this before, it genuinely changes how a drawer functions. Instead of stacking shirts in layers, they stand upright — like files in a filing cabinet. You can see every single shirt at once. You pull one out and nothing else moves.
This is the method to use for t-shirts, crew necks, and lightweight long-sleeve shirts stored in a dresser drawer.
How to do it:
- Start with a flat fold. Follow the steps in the previous section to get your shirt into a long, narrow rectangle.
- Fold the rectangle in half lengthwise. You now have a shape that’s taller and narrower — roughly the width of a folded sheet of paper, maybe a bit wider.
- Fold in thirds from the bottom up, just like you’d fold a letter. First fold the bottom third up, then fold that in half again. The exact number of folds depends on the shirt’s length — you’re aiming for a finished package that can stand on its own without flopping over.
- Stand the shirt upright on its folded edge in your drawer. Place the next shirt right next to it. Repeat until the row is full.
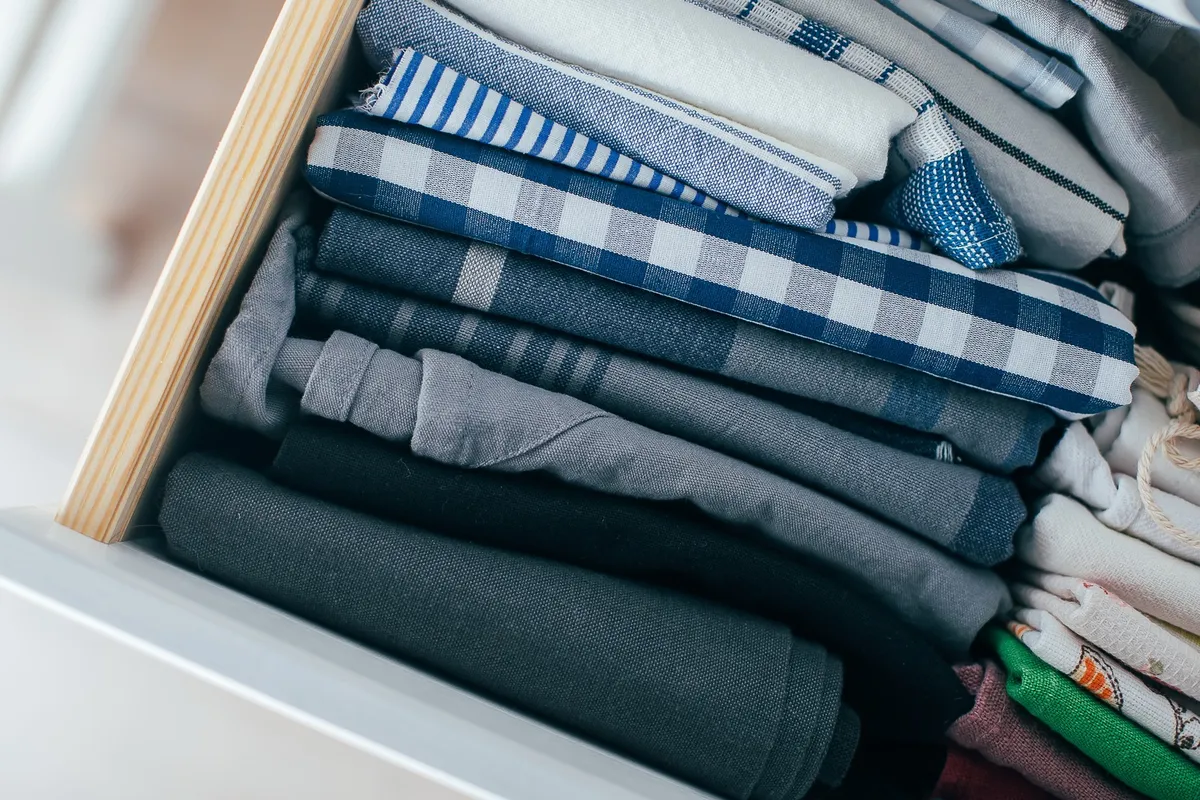
The whole drawer should look like a row of standing rectangles when you’re done. You’ll likely see the collar or graphic of each shirt at the top, which makes it easy to identify what you’re looking at.
Why it works: No shirt is sitting under the weight of another shirt. Pulling one out doesn’t shift its neighbors. And because you can see everything at once, you actually wear more of your shirts — the ones that used to live at the bottom of the stack and never see daylight.
This method works best when paired with some kind of drawer divider or small fabric bin to create lanes. Without a divider, the rows can drift sideways over time and eventually tip. Even a simple adjustable divider keeps each row standing properly. This is the one product that genuinely makes the file fold sustainable long-term.
Check out How to Organize a Dresser Drawer Once and Keep It That Way for more on setting up a drawer system that holds.
How to Fold Button-Down and Dress Shirts Without Wrinkles
Button-downs need to be handled differently. The collar, the placket (that center button strip), and the structured fabric all need to stay flat or they’ll wrinkle in ways that are genuinely hard to iron out.
How to do it:
- Button every other button down the front. This keeps the placket smooth and prevents the front from gaping open while you fold.
- Lay the shirt face-down on your flat surface. Fold one sleeve diagonally across the back of the shirt — angle it toward the opposite shoulder, not straight across. This keeps the shoulder seam flat.
- Fold the sleeve back on itself so the cuff ends near the center of the shirt’s back. Repeat on the other side.
- Fold each side in toward the center so the shirt is about one-third of its original width. It should look like a long rectangle with no sleeves sticking out.
- Fold from the bottom up — either in half or in thirds depending on how deep your shelf is. Never roll a button-down; rolling creates deep creases in the collar and placket that won’t come out without ironing.
When to hang instead: Linen, silk, or structured dress shirts are better hung. These fabrics wrinkle from being folded and don’t benefit from the space savings the way knits do. If closet space is tight, slim velvet hangers take up significantly less room than standard plastic ones and keep dress shirts from slipping off.
Travel tip: This exact method works inside a suitcase. Lay folded button-downs flat on top of each other — they’ll arrive in much better shape than if you’d rolled them or tossed them in loosely.
How to Fold Long-Sleeve and Crew Neck Shirts
Long-sleeve shirts use the same basic method as t-shirts, with one extra step to stop the sleeves from creating bulk on the sides of the finished fold.
How to do it:
- Lay the shirt face-down. Starting with one side, fold the sleeve across the back of the shirt at the shoulder seam — so the sleeve runs parallel to the shirt’s spine.
- Fold that sleeve back on itself toward the shoulder so it lies flat within the body of the shirt. The cuff should end somewhere around the middle of the shirt’s back. This is the key step — you’re tucking the sleeve inside the silhouette of the shirt so it doesn’t poke out the sides.
- Repeat on the other side. The shirt should now look like a clean rectangle with no sleeve fabric sticking out past the edges.
- From here, fold in thirds from the bottom up for the file fold, or fold in half for shelf stacking.
For hoodies and sweatshirts: the same sleeve technique works, but the thicker fabric means your finished rectangle will be significantly bulkier. Most sweatshirts are better stored on a shelf than crammed into a drawer. Folded flat on a shelf or in a cube organizer, they stay accessible without taking over drawer space.
If you’re short on shelf space, 10 Small Closet Organization Ideas That Double Your Space has some good options for bulky items.
Common Shirt Folding Mistakes That Undo All Your Work
You can fold everything perfectly and still end up back at chaos if any of these are happening:
- Overstuffing the drawer. Even perfect file-folding collapses when there’s no room. Before you put anything back, pull out any shirt you haven’t worn in 6 months. Less is genuinely easier to maintain. Aim to remove at least 20% of what’s currently in there.
- Mixing folding methods in one drawer. File-folded shirts and flat-stacked shirts create uneven heights that tip into each other. Pick one method per drawer and stick to it.
- Folding shirts inside-out without noticing. Check before you fold. Inside-out shirts folded repeatedly can stretch the collar and cause fabric stress at the seams.
- Stacking just one shirt. You have a beautifully file-folded drawer and then one shirt gets tossed in on top. Now two shirts are disturbed, then three. The whole row goes sideways within a week. Every shirt goes back in upright — no exceptions.
- Skipping the flat surface. Folding in mid-air or on an uneven surface creates crooked folds that don’t stack or stand correctly. Table or bed, every time.
- Not refolding after laundry. The system works because of consistency. If clean laundry gets tossed back in unfolded, you’ve just reset the problem. Refolding takes about 5 minutes once you’ve practiced — it becomes fast.
How to Set Up Your Drawer So Folded Shirts Actually Stay That Way
Folding correctly is step one. How you set up the drawer determines whether it stays that way for more than a week.
Steps to set up a drawer that holds:
- Add drawer dividers to create lanes. One lane for t-shirts, one for long-sleeves, one for crew necks, whatever categories make sense for your wardrobe. Dividers prevent rows from leaning into each other. Adjustable versions let you resize lanes as your wardrobe changes.
- Put your most-worn shirts at the front of each lane. You’ll naturally reach for these first, which means less disruption to the shirts behind them.
- Make refolding part of laundry put-away, not a separate task. After every wash, fold and stand shirts as you put them away. This takes about 5 minutes once you’re practiced and is the only thing that makes the system self-sustaining.
- If your drawer is very deep, add a riser at the back. A small box or folded towel under the back row brings those shirts up so they’re visible. Without it, shirts in the rear get buried and forgotten.
- Do a quick reset every few weeks. Pull everything out, refold anything that’s gotten sloppy, and put it back. Takes less than 10 minutes and resets the whole drawer.
For more on reducing the number of shirts you’re managing in the first place, How to Declutter Your Closet When You Have Too Many Clothes is a good next step.
FAQ
Is it better to hang or fold shirts?
It depends on the fabric. T-shirts, casual long-sleeves, and knits do well folded — hanging them can actually stretch the collar over time. Button-downs, dress shirts, and anything structured should be hung to prevent deep wrinkles. If closet space is tight, fold the casuals and reserve hanging for the items that truly need it.
How do I keep folded shirts from getting wrinkled in the drawer?
Make sure shirts are fully dry before folding, use a flat surface for clean even folds, and avoid overpacking the drawer. The file-fold method actually causes fewer wrinkles than stacking because shirts aren’t pressed under the weight of others — just standing side by side.
How many shirts should fit in one drawer?
With the file-fold method, most standard dresser drawers comfortably hold 12-18 t-shirts standing upright. If you’re forcing more than that in, the drawer becomes hard to close and shirts will topple. It’s better to use a second drawer or a shelf than to cram everything into one.
Start tonight with the drawer you open most. Empty it out, set a 20-minute timer, and refold everything using the file-fold method. You’ll have a drawer you can actually use by tomorrow morning — and getting dressed will take noticeably less time starting immediately.