Clutter doesn’t pile up because you’re disorganized or lazy. It piles up because life is busy, decisions are exhausting, and somehow the flat surfaces in your home become a magnet for everything that doesn’t have a home yet. If you’ve been staring at the mess for weeks — or months — feeling paralyzed about where to even begin, you’re not alone and you’re not failing.
This guide walks you through a room-by-room process that actually works for real homes with real amounts of stuff. You don’t need a full weekend, a perfect plan, or a Pinterest-worthy pantry waiting on the other side. You need a system that moves you forward. By the time you finish reading, you’ll know exactly where to start — and you can do it today.
Realistic time commitment: a single bathroom or junk drawer takes 30-45 minutes. A kitchen takes 2-3 hours spread across a day. A full home pass takes 2-4 weekends if you do it one room at a time. Pick your pace.
Why Decluttering Feels So Hard (And Why That’s Normal)
Here’s the thing nobody says out loud: decluttering is emotionally exhausting, not just physically exhausting. Every item you pick up requires a decision. Keep it? Lose it? Where does it go? After about 45 minutes of that, your brain just… stops cooperating. That’s decision fatigue, and it’s real.
On top of that, clutter is rarely just stuff. It’s the bread maker your mom gave you that you’ve used once. It’s the jeans you paid too much for that don’t fit the way they used to. It’s the birthday card from someone you miss. Deciding whether to keep those things involves a lot more than just space management — it involves memory, guilt, and identity.
The three biggest traps people fall into:
- Sentimental guilt: “But someone gave me this” or “I paid good money for it”
- Someday thinking: “I might need this eventually” (spoiler: you usually won’t)
- Gift guilt: keeping things you don’t want because throwing them out feels disrespectful
None of these make you weak. They make you human. But recognizing the trap is how you start working around it.
The other thing worth saying upfront: you do not need a perfect organizational system before you start. Action first, systems second. Buying matching bins before you’ve decluttered is just rearranging the problem. Start messy. Fix the systems later when you know what you actually have and need.
And finally — real homes get messy again. You’re not building a museum. You’re creating a home that’s easier to manage. Progress over perfection, every time.
Before You Start: Gather Your Supplies and Set a Timer
This step takes 5 minutes and it makes everything else easier. Don’t skip it.
The four-box method is your framework for every single room:
- Keep — it belongs here and you use it
- Donate — it’s in good condition but you don’t need it
- Trash — broken, expired, or genuinely useless
- Relocate — it belongs somewhere else in the house
You’ll need:
- Large garbage bags (trash and donate, different colors if you can swing it)
- A couple of cardboard boxes or laundry baskets for Keep and Relocate
- A marker for labeling if you’re doing multiple rounds
- A timer on your phone
The timer is non-negotiable. Set it for 30 or 45 minutes. When it goes off, you stop — even if you’re mid-cabinet. This sounds counterproductive, but it prevents the spiral where you burn yourself out on day one and don’t come back for three weeks. You can always start the timer again. You can’t undo burnout.
Pick ONE zone to start. Not one floor. Not one half of the house. One zone — a bathroom, the entryway, the kitchen junk drawer. You’re not trying to finish your whole home today. You’re trying to build momentum.
Optional but genuinely useful: take a “before” photo of your starting space. You’ll want it later when your brain tries to convince you you haven’t made any progress.
Step 1 — Start With the Easiest Room First
This is counterintuitive, but trust the process: do not start with the most cluttered room in your house. Start with the easiest one.
The best first-day zones are:
- A bathroom cabinet or under-sink area
- The junk drawer in the kitchen
- An entryway shelf or coat closet
Here’s why this matters. Decluttering builds a skill, and that skill is making decisions quickly without second-guessing every choice. Small, low-stakes spaces let you practice. And finishing one space — even a small one — gives you a visible win that makes the bigger spaces feel possible instead of impossible.
Let’s walk through the bathroom as an example, because it’s usually the fastest win.
Pull everything out from under the sink or from the cabinet shelves. Everything. Line it up on the counter or the floor so you can see it all at once. Now sort:
- Expired products go directly in the trash. Check the dates on medications, sunscreen, and skincare. If you can’t find a date and you’ve had it since the last administration, toss it.
- Duplicates: do you have four half-used bottles of conditioner? Consolidate or donate sealed duplicates.
- Mystery samples: the travel-size stuff from hotel rooms and gift sets. If you haven’t used them in 6 months, you’re not going to. Out they go.
A simple rule of thumb that works across every room: if you haven’t used it in 6 months and it’s not seasonal, it goes. Winter coats in July get a pass. The aspirational face mask you’ve been “meaning to try” since 2022 does not.
Step 2 — Tackle the Kitchen (The Room With the Most Hidden Clutter)
Kitchens are sneaky. They accumulate clutter in ways that feel invisible until suddenly you can’t close a drawer. Duplicate tools, appliances from a cooking phase you moved past, expired canned goods — it adds up fast.
The key is to work one cabinet at a time instead of pulling everything out at once. Here’s the process for each cabinet:
- Empty the cabinet completely — every single item out
- Wipe the shelf while it’s empty (you’ll want to do this anyway)
- Sort everything into your four boxes — keep, donate, trash, relocate
- Return only what you use regularly — if it goes back, it earns its spot
Run the duplicates test on every category. Do you need four spatulas? Two sets of measuring cups? Three can openers? Pick the best one or two, donate the rest. The “but what if someone’s helping me cook” argument is valid for maybe one extra spatula, not four.
For your pantry, start by pulling out and tossing everything expired — this alone usually clears more space than you’d expect. Then group what’s left by category: canned goods together, grains together, baking supplies together. Donate unopened non-perishables you bought with good intentions but will never realistically cook. Food banks accept them, and it’s a good use of the item.
The biggest kitchen trap is appliances kept “just in case.” The panini press. The quesadilla maker. The pasta machine you used twice in 2019. These eat enormous amounts of cabinet and counter space. If you haven’t used an appliance in a year, and you don’t have a concrete plan to use it in the next 3 months, let it go. Someone else will use it more than you are.
For ideas on what to do with the cabinet space you free up, check out Kitchen Cabinet Organization Ideas That Actually Stay Organized.
Step 3 — Conquer the Bedroom and Closet
Your bedroom matters more than people realize for this process. Clutter in sleep spaces has a real impact on rest and mood — it’s visual noise your brain processes even when you’re trying to wind down. Getting this room cleaner is worth prioritizing.
Start with the flat surfaces, not the closet. The nightstand, the dresser top, the chair. You know the chair. Every bedroom has a chair, and it is covered. Clear those surfaces first because they’re the most visually impactful and they don’t require hard decisions the way clothes do.
When you’re ready for the closet, start with the obvious stuff: broken hangers, single socks, clothes with tags that have been there so long the glue is deteriorating. This takes 10 minutes and clears enough space to actually see what you’re working with.
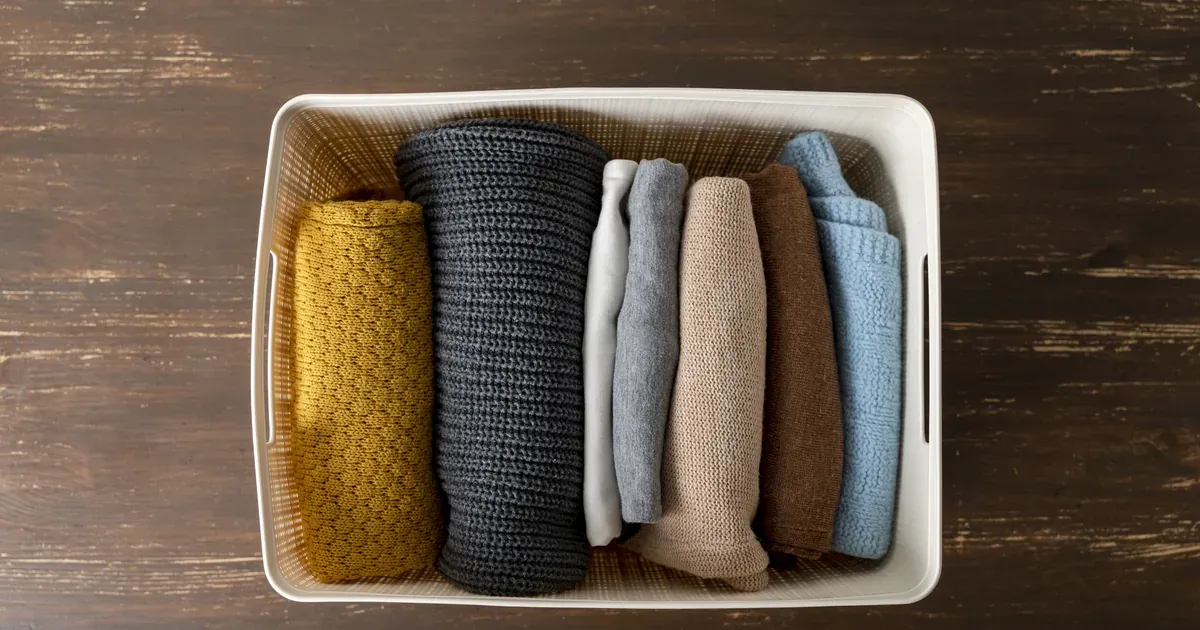
Then move to clothing. The rule that actually works isn’t “does it spark joy?” It’s: if you put it on and feel bad about yourself, it goes — regardless of what you paid for it. Clothes that make you feel frumpy, too tight, or vaguely uncomfortable every time you see them are not serving you. They’re just taking up space and delivering a small daily sting.
For identifying clothes you genuinely don’t wear, try the reverse hanger trick: turn all your hangers backward (hook facing out instead of in). As you wear and return items, hang them normally. After 3-6 months, anything still backward hasn’t been worn. Those are your candidates for the donate box.
For more detailed help on this space, How to Declutter a Bedroom: A Step-by-Step Guide for a Calmer Space goes deeper into the whole process.
Step 4 — Deal With the Hardest Stuff: Sentimental Items and Paper Clutter
Save this one for last. Always. If you try to sort through your grandmother’s dishes or your kids’ artwork on day one, you’ll stall out in under 20 minutes and the whole effort grinds to a halt. Do sentimental items after you’ve built up your decision-making muscle on easier categories.
For sentimental objects, the memory box method works well. Limit keepsakes to one box per person in the household. This forces curation — you’re choosing the most meaningful things rather than keeping everything out of guilt. When the box is full, something comes out before something new goes in.
Before donating an item you feel conflicted about, take a photo of it. The memory lives in you, not the object. A photo lets you honor it without it occupying physical space in your home forever.
For paper clutter, which is its own special nightmare:
- Toss junk mail immediately — at the mailbox if you can, before it touches a surface
- Scan important documents — tax records, insurance paperwork, medical documents. A basic scanner app on your phone works fine.
- Keep a small “to action” folder for things that genuinely need a response or follow-up. One folder, not a pile.
Kid artwork and schoolwork is emotionally loaded and never-ending. A practical approach: photograph pieces digitally before they leave the house. Keep a small, curated physical stack of the most meaningful ones — maybe one school year’s worth. The rest lives in a digital album where you can actually look at it without excavating a storage bin.
For managing the paper systems long-term, a simple accordion file organizer for your important documents and a desktop folder for active paperwork goes a long way. No system needs to be complex to work.
Common Decluttering Mistakes to Avoid
-
Organizing before decluttering. Buying bins and baskets before you’ve purged just gives clutter a more organized home. Purge first, then figure out what you need to contain what’s left.
-
Doing the whole house in one day. You’ll hit a wall around hour 3, start making bad decisions (or no decisions), and end up with piles everywhere that feel worse than what you started with. One room or zone per session.
-
Asking someone else to sort your stuff. Having a partner or family member declutter your belongings sounds efficient but usually backfires — they don’t know the significance of your things, and you end up re-sorting what they sorted. Do your own stuff yourself.
-
Leaving the donate boxes in the house too long. This is how things creep back in. Set a rule: donate boxes leave your house within 48 hours of being filled. Put them in the car the same day if possible.
-
Comparing your home to Instagram or Pinterest. Those photos are staged. The people in them also have clutter somewhere. Real homes look lived-in, and that’s normal. Aim for your version of manageable, not someone else’s version of perfect.
-
Quitting when it looks worse in the middle. Every declutter session hits a point where it looks more chaotic than when you started. This is normal — you’ve pulled things out and haven’t sorted yet. Push through this phase. It resolves.
How to Keep Your Home Clutter-Free After Decluttering
Decluttering once is great. Not having to do a massive purge again in 18 months is better.
The most effective habit is the one in, one out rule: every time something new comes into your home, one thing leaves. New shirt? One shirt goes to donate. New kitchen gadget? One gadget goes. It keeps the total volume of stuff stable without requiring a lot of willpower.
Once a week, do a 10-minute reset. Grab a laundry basket, walk through each room, drop in anything that’s out of place, then spend 5 minutes returning everything to where it belongs. This takes less time than you think and prevents the pile-up that requires a full declutter session.
Keep a small donation box or basket in a closet or corner of the garage. As you notice things throughout the year — the mug you never use, the book you won’t re-read — drop them in passively. When the box is full, it leaves. No big purge required.
If you have a household, this works better when everyone’s involved. Assign zones, keep the systems simple enough that a kid can follow them, and frame it as an ongoing habit rather than a project with an end date. How to Organize a Small Closet on a Budget has some good ideas for shared spaces with limited room.
Start with one drawer or shelf today. Empty it, run the four-box method, put back only what belongs there. That’s it. You’ll have one organized space before tonight.
FAQ
Where should I start when decluttering my entire home?
Start with the easiest, smallest space — like a bathroom cabinet or junk drawer — not the most cluttered room. A quick win builds momentum and confidence before you tackle bigger, more emotionally loaded spaces like bedrooms or storage rooms.
How long does it take to declutter a whole house?
It depends on home size and clutter level, but most people need 2-4 dedicated weekends for a thorough pass. Breaking it into one room per session makes it sustainable without burnout. You don’t have to do it all at once.
What do I do with all the stuff I’m getting rid of?
Sort items into donate, trash, and sell piles. Donation centers like Goodwill, Habitat for Humanity ReStores, or local Buy Nothing groups are the fastest way to clear items out. Get the donation boxes out of your house within 48 hours so nothing creeps back in.
How do I declutter when I’m emotionally attached to things?
Save sentimental items for last, after you’ve practiced letting go with easier categories. Try limiting keepsakes to one memory box per person, and photograph items that carry memories before donating them. The goal is to keep only what genuinely brings you joy or serves a real purpose.
Is it better to declutter room by room or category by category?
For most people, room by room is more manageable and shows faster visible results. Category decluttering works well for clothing but can feel overwhelming when it means pulling items from every room at once. Start with whatever approach you’ll actually finish.
Pick the room you’re most frustrated with right now — not the worst one, just the most annoying one. Set a 30-minute timer tonight, grab three trash bags, and start with one cabinet or one flat surface. You don’t need to finish. You just need to start.