You open the closet to grab a jacket and spend 45 seconds fighting through things you haven’t touched since 2019. The kitchen counter has a permanent layer of stuff you’re “going to deal with later.” And somewhere in the back of your mind, there’s a low-grade hum of stress that just… never goes away.
That’s what clutter does. It’s not just a visual problem — it’s a mental one.
This guide will walk you through how to declutter your entire house using a zone-by-zone system that actually holds up in real life — not just on a good Saturday when you’re feeling ambitious. You don’t need a free weekend or a minimalist mindset. You need a clear plan, a timer, and about 30-45 minutes at a stretch. Most homes take 2-4 weeks of short sessions. That’s it.
Why Whole-House Decluttering Feels So Hard (And How to Fix That)
Here’s the thing nobody says out loud: clutter isn’t a laziness problem. It’s a decision fatigue problem.
Every item in your home requires a micro-decision every time you look at it. Do I keep this? Use this? Move this? When you multiply that by thousands of objects, your brain gets tired before you even open a drawer. That’s why you walk into a messy room, feel instantly exhausted, and leave to go do literally anything else.
The biggest mistake people make is treating decluttering like a one-time event — a big dramatic weekend purge that will fix everything. That approach almost always ends in abandoned piles, donated bags sitting in the trunk for three weeks, and a house that’s somehow messier than when you started.
The approach that actually works is smaller and less exciting: zone by zone, session by session.
Instead of “I’m decluttering the whole house this Saturday,” you commit to “I’m spending 30 minutes on the kitchen counter tonight.” That’s a decision you can actually follow through on, and it builds momentum instead of burning it out.
Set realistic expectations now: the average home takes 2-4 weeks of consistent short sessions to properly declutter. That’s not failure — that’s just how long it takes when you do it in a way that sticks.
Before You Start: Set Up Your Declutter System
Before you touch a single drawer, spend 10 minutes setting yourself up. Skipping this step is why most declutter attempts stall.
The four-box method: Grab four containers — boxes, bags, laundry baskets, whatever you have — and label them:
- Keep — stays in this room, in its rightful place
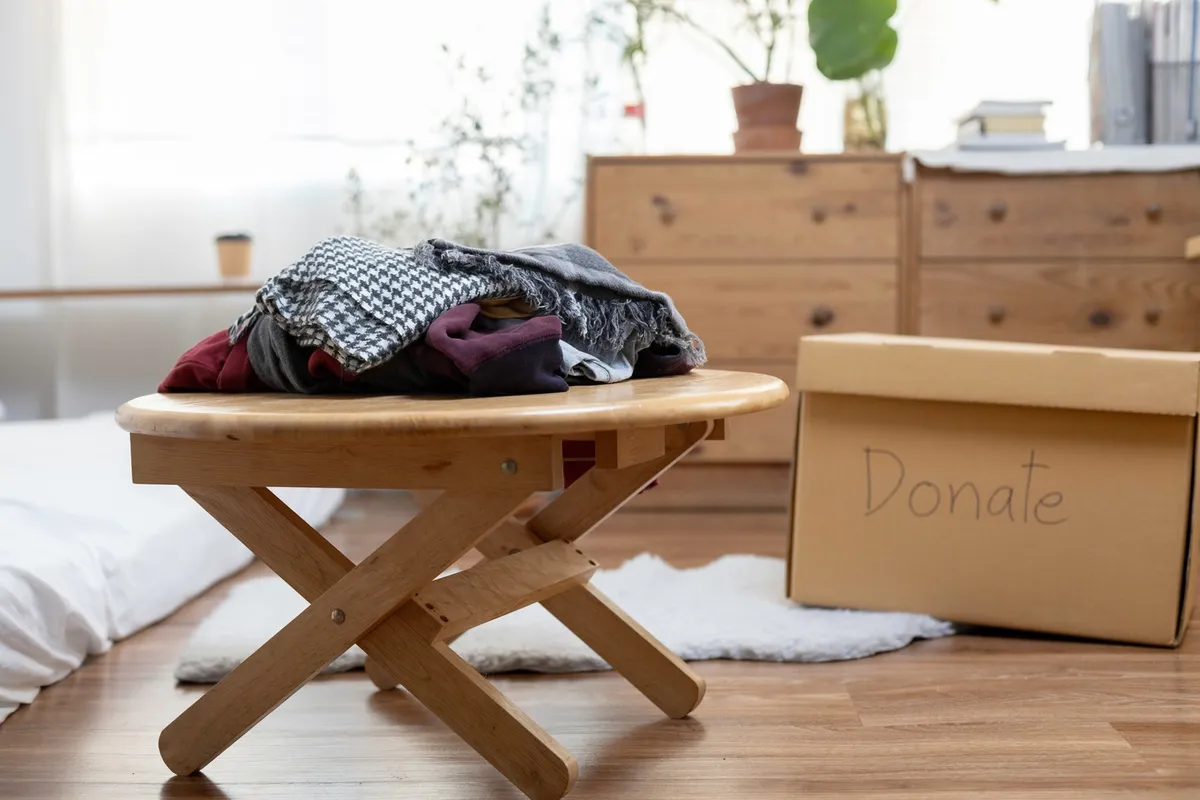
- Donate — goes to charity, resale, or a friend
- Trash — expired, broken, genuinely useless
- Relocate — belongs somewhere else in the house
That’s your whole system. Everything you pick up goes into one of those four categories. No “maybe” pile (more on why that’s dangerous in the Mistakes section).
What you actually need to start:
- 4 boxes or bags, clearly labeled
- A marker (for labeling and for trash bags)
- Heavy-duty trash bags for actual garbage
- A timer on your phone
- Optional: a before photo of the space
That’s the whole supply list. Notice what’s not on it: organizers, bins, shelf dividers, label makers. Do not buy storage products before you declutter. This is one of the most common traps — you spend a Sunday afternoon at Target, bring home a cart full of bins, and then spend your energy arranging clutter rather than eliminating it. Buy organizers only after you know what you actually have to store.
Set your first session for 30-45 minutes. That’s enough time to make visible progress without hitting a wall. Pick a day this week — not “soon,” not “the weekend” — and put it on your calendar like an appointment.
Start Here: Decluttering the Kitchen
The kitchen is the best place to start, and this isn’t an accident. Kitchen items are mostly practical — you use something or you don’t — so decisions are faster. And the wins show up immediately. A cleared counter looks dramatically different after one session, and that visual payoff is what keeps you going.
Counter surfaces first. Remove everything from your counters. Every appliance, every fruit bowl, every random key and coupon. Then ask: does this earn its spot? Return only what you use at least once a week. The rest gets relocated or donated.
Then move to cabinets and drawers. Work one section at a time — upper cabinets, lower cabinets, the dreaded junk drawer separately. Pull everything out and sort:
- Remove expired pantry items immediately — no deliberating
- Collect duplicate tools (three spatulas, four wooden spoons — pick your favorite two)
- Pull out gadgets you haven’t used in a year (avocado slicer, we’re looking at you)
- Consolidate Tupperware and lid matches — if it has no partner, it goes
Questions worth asking in the kitchen:
- How many mugs do two people actually use? (Usually not 24.)
- Do you own a pan that lives in the back and never comes out?
- How many sets of measuring cups do you realistically need?
Once you’ve decluttered, the “one in, one out” rule keeps things from creeping back. New pan comes in? An old one leaves. It takes about 10 seconds and it works.
After the kitchen is done, you’ll have a real sense of what the process feels like — and you’ll want to keep going. That’s the point. For next steps in the kitchen space, check out Kitchen Drawer Organization Ideas That Actually Stay Tidy.
Tackling Clothes and Closets Room by Room
Clothes are where people get stuck. There’s emotion tied up in clothes — the jeans from a decade ago, the dress you’ll wear “someday,” the gift sweater you’ve never loved. Give yourself extra time here.
Start by pulling everything out. Every item needs to come out of the closet, off the shelves, out of the dresser. You genuinely cannot evaluate what you have when it’s crammed in there. Yes, it gets messier before it gets better. That’s normal.
Work by category, not by location:
- Tops — all shirts, blouses, tanks together
- Bottoms — pants, jeans, shorts, skirts
- Dresses and jumpsuits
- Shoes — including what’s under the bed and in the closet floor
- Accessories — belts, scarves, bags separately
For each item, ask one question: would I buy this today? Not “do I kind of like it” or “could I wear it to something.” Would you buy it, right now, in this condition? If the answer is no, it goes.
For seasonal and sentimental pieces, use the 12-month rule: if you haven’t worn it in the past year (giving it a full seasonal rotation), it’s time to let it go — unless it has genuine sentimental meaning, in which case give it a real home, not a pile.
Dresser drawers: set a 15-minute timer per drawer. That’s it. Don’t give yourself longer — time pressure helps cut through the “but maybe someday” thinking.
When you’re ready to donate, go somewhere convenient. Goodwill, ThredUp (they send you a prepaid bag), local shelters, Facebook Marketplace for higher-value pieces. If the drop-off is inconvenient, the bags will live in your trunk for months. Pick the closest option and go this week.
For what comes next in the closet, How to Organize a Small Closet on a Budget has practical ideas once the excess is cleared out.
Living Areas: Decluttering Without Losing Comfort
Living rooms are tricky because you actually want them to feel lived-in. The goal isn’t a showroom — it’s intentional. There’s a real difference between cozy and cluttered, even if it’s hard to put into words.
The clearest sign of the difference: can you put something down and find it again? If yes, you’re in cozy territory. If flat surfaces are so full that nothing has a real home, you’ve crossed into clutter.
Target flat surfaces first. Coffee tables, bookshelves, mantels — these are clutter magnets. Clear them completely, then return only items that are either useful or genuinely loved.
For books and magazines: keep what you’ll read again or reference. Donate the rest. If you’re a big reader, How to Declutter When You Feel Overwhelmed and Don’t Know Where to Start has a good framework for sentimental categories.
For decor, run everything through the “does this earn its space?” test: do you actually like this, or are you just used to it being there?
If you have kids’ toys in the living room, the rotation system is your best tool. Keep about a third of the toys accessible at a time; box the rest in a closet. Rotate every few weeks. Kids engage more with fewer toys, and the room stays manageable.
Quick win: the 10-item method. When the living room feels overwhelming, just find 10 things to remove right now. Trash, donate, or relocate — doesn’t matter. Just 10 things. It takes under 5 minutes and breaks the paralysis.
Bathrooms, Linen Closets, and Paper Clutter
Good news: bathrooms are fast. Most of what’s in there is practical and emotionally neutral. A 20-minute session can genuinely transform a bathroom.
Pull out everything from under the sink and the medicine cabinet. Trash anything expired — makeup, sunscreen, medications, vitamins all have expiration dates that matter. Remove duplicates (do you need four half-empty bottles of the same conditioner?). Then reorganize only what’s left.
Linen closets: here’s the honest answer to how many sheet sets you need per bed — 2. One on the bed, one in the wash. Maybe 3 if you have a guest bed that turns over often. Beyond that, you’re storing sheets you don’t use.
Paper clutter is the sneakiest kind because it accumulates silently. Junk mail, school forms, receipts, appliance manuals — it piles up on every flat surface in the house. Use a simple 3-folder system:
- Action — needs a response or decision within the week
- File — keep for records (taxes, insurance, warranties)
- Shred — personal info that needs to be destroyed, not just recycled
Touch every piece of paper once. Don’t put it back in a pile “to deal with later.”
Save the garage and storage rooms for last. They’re the heaviest lift — physically and emotionally — and you’ll be better equipped to handle them after you’ve had a few wins elsewhere.
Common Decluttering Mistakes That Slow You Down
- Organizing instead of decluttering. Buying bins and neatly stacking your clutter is not the same as reducing it. Sort and purge before you organize — always.
- Keeping things out of guilt. The gift you hate, the inherited item you don’t love — keeping it doesn’t honor the person. Donate it without the guilt spiral.
- The “maybe” pile with no deadline. If you can’t decide, box it up, write a date 48 hours from now on the box, and if you haven’t thought about it, donate it unopened.
- Decluttering someone else’s stuff without their input. This blows up the whole process. Focus on your things; invite (don’t pressure) others to participate in their own spaces.
- Chasing perfection. A half-cleared drawer is better than a “not yet started” one. Done is better than perfect — always, every time.
- Donating to an inconvenient location. If the drop-off is across town, those bags will live in your trunk for a month. Find the closest donation point and commit to it.
How to Keep Your House Decluttered (So You Don’t Start Over in 6 Months)
The hard work is done. Now you just need a light maintenance system so it doesn’t creep back.
Weekly 10-minute reset. Pick one consistent day — Sunday evening, Friday afternoon — and spend 10 minutes returning things to their homes, tossing obvious trash, and doing a surface wipe-down. Make it a ritual, not a chore. Put on a podcast, light a candle, make it something you mildly look forward to.
Monthly one-in-one-out check. When something new comes in — a gadget, a clothing item, a book — something else leaves. This isn’t about being strict; it’s about stopping the slow accumulation before it starts again.
One area per season. Every 3 months, pick one area for a light purge — the coat closet, the bathroom cabinet, the pantry. About 20-30 minutes per season prevents the backslide that leads back to full overwhelm.
Keep a donation box in a closet year-round. When you come across something that doesn’t belong — a book you’ve finished, a shirt that doesn’t fit right — drop it in the box instead of putting it back. When the box is full, drop it off. This is the single easiest maintenance habit because it requires zero extra effort.
FAQ
How long does it really take to declutter an entire house?
For an average 3-bedroom home, expect 2-4 weeks of short sessions running 30-60 minutes each. Trying to do it all in one weekend leads to burnout and abandoned piles. Consistent small sessions work far better than a single exhausting marathon.
What’s the best room to start decluttering when you feel overwhelmed?
Start with the kitchen or one bathroom — these rooms have mostly practical items with less emotional weight, so decisions are faster. A visible win early in the process gives you the momentum to keep going through harder areas like closets or sentimental storage.
Should I buy storage bins and organizers before I start decluttering?
No — this is one of the most common mistakes. Buy organizers only after you’ve finished decluttering a space, so you know exactly how much you actually have to store. Buying bins first often means organizing clutter rather than eliminating it.
Start tonight. Not this weekend, not when you have more time — tonight. Pick the one cabinet or drawer you open most often, set a 30-minute timer, and run through the four boxes. You’ll end the night with one small corner of your home that finally feels manageable. That’s how the whole thing gets done: one drawer, one session, one win at a time.